TIG Welder Duty Cycle Explained: What 60% at 200 Amps Really Gets You
TIG Welder Duty Cycle Explained: What 60% at 200 Amps Really Gets You
A TIG machine advertised as “200 amps” might give you that output for only two minutes out of ten. Another might hold it for six. Both can make the same short weld, but they’re very different tools when you’re running aluminum beads and the parts keep coming. Understanding TIG welder duty cycle tells you whether you’re buying enough machine for the work—or buying a regular appointment with the overtemperature light.
What Duty Cycle Means on a TIG Welder
Duty cycle is the percentage of a specified test period that a welder can operate at a stated output without exceeding its thermal limits. Most modern TIG machine ratings use a ten-minute period, but check the manual rather than assuming. A 60% duty cycle at 200 amps means six minutes welding at that rated output followed by four minutes cooling, under the stated test conditions. It does not mean you can weld at 200 amps for 60% of an entire shift without considering how those minutes are grouped.
The amperage belongs right beside the percentage. “60% duty cycle” by itself tells you very little because that rating could apply at 200 amps, 150 amps, or considerably less. Turn the output down and the machine generally produces less internal heat, so its allowable welding time increases. That’s why a useful specification gives you several points or a duty-cycle curve.
- 20% at 200 amps: two minutes welding, eight minutes cooling in a ten-minute rating period.
- 60% at 200 amps: six minutes welding, four minutes cooling.
- 100% at 200 amps: continuous rated operation under the specified conditions, provided the rest of the system can keep up.
Those cooling minutes normally mean leaving the machine powered on so its cooling system can work as designed. Follow the manufacturer’s instructions, including any fan-on-demand behavior. Switching the machine off doesn’t magically remove the heat stored inside it.
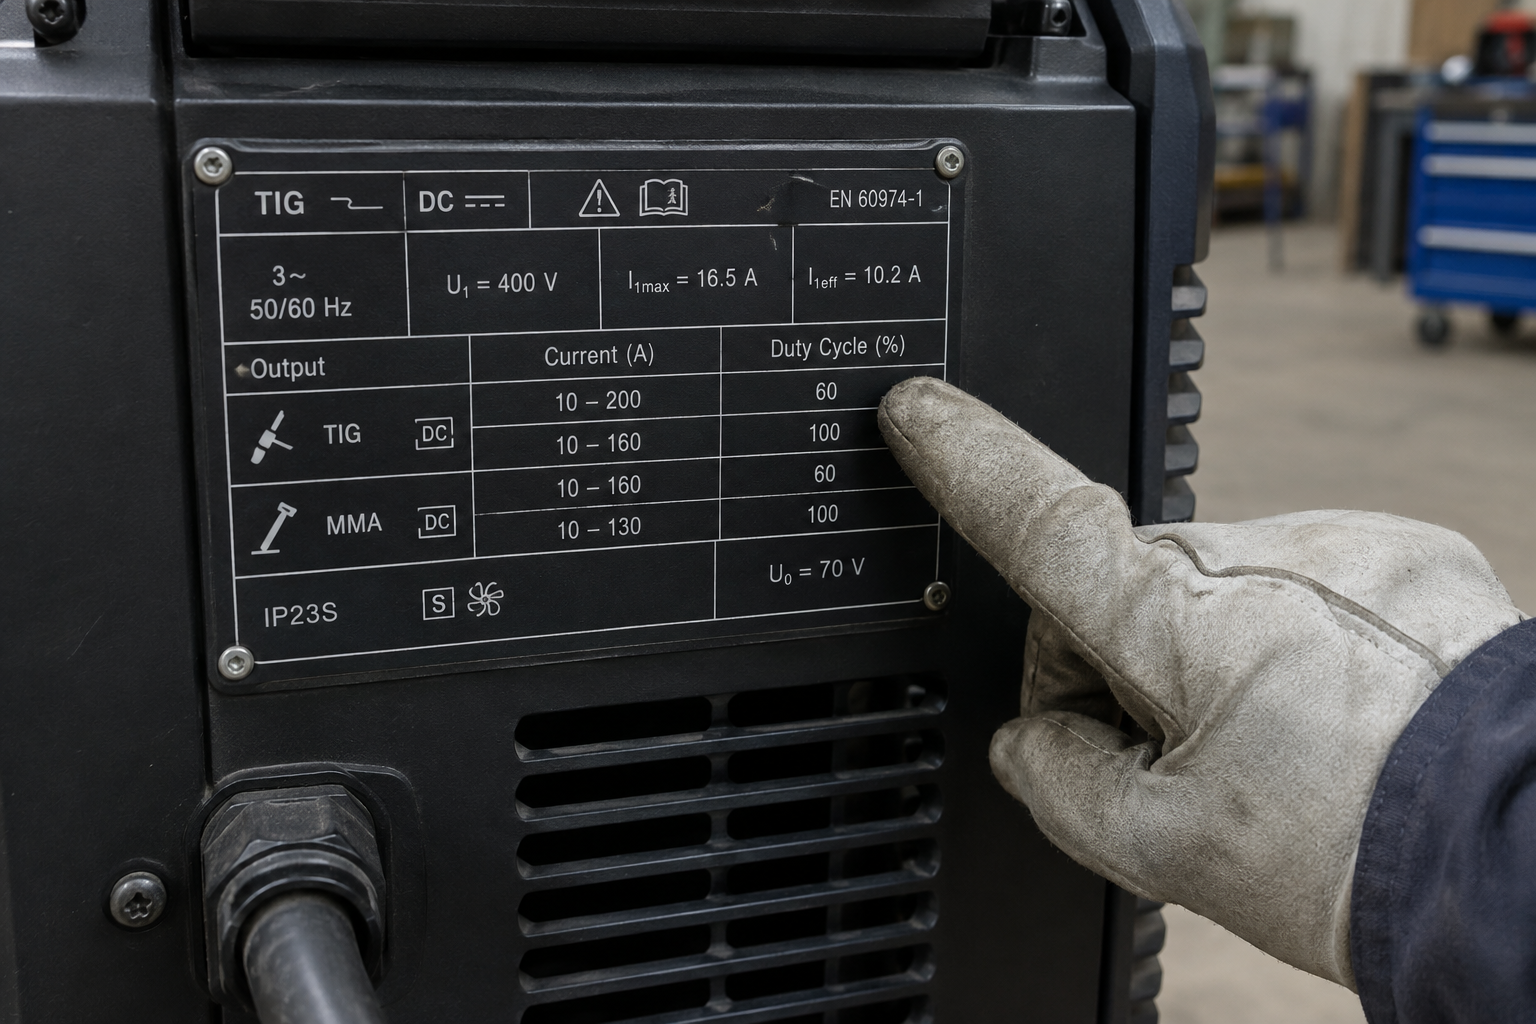
Read the Rating Plate, Not Just the Biggest Amp Number
A proper comparison starts with output current, rated load voltage, input supply, and test temperature. Many industrial ratings use a 40°C ambient temperature, which is 104°F, while some published specifications use cooler conditions. A machine tested at 20°C has an easier cooling job than one tested at 40°C, so those percentages aren’t directly comparable. Look for the rating conditions and applicable standard, commonly IEC 60974-1, in the documentation.
Here’s an illustrative specification for one machine on one input supply and welding mode. These numbers are examples, not a recommendation or a claim about a particular product. The point is to read across the rating rather than stopping at maximum output.
| Rated welding current | Duty cycle | Meaning over ten minutes |
|---|---|---|
| 200 amps | 40% | Four minutes welding, six minutes cooling |
| 160 amps | 60% | Six minutes welding, four minutes cooling |
| 125 amps | 100% | Continuous operation at the rated conditions |
Check the Input Voltage and Welding Process
A dual-voltage welder can have substantially different output limits on 120-volt and 240-volt power. Also check whether the published rating applies to TIG or stick, and whether the manufacturer lists separate AC and DC ratings. Rated load voltage matters because equal amperage doesn’t necessarily mean equal output power or internal heating across processes. Use the rating for the setup you’ll actually run.
Measure Arc-On Time Against the Work You Actually Do
Your time at the welding bench isn’t the same as your arc-on time. Fitting tubing, brushing aluminum, repositioning a frame, and changing filler rods all interrupt welding. If you’re putting short welds around a 304L stainless frame, those interruptions may keep you comfortably below the machine’s rating. Long seams are a different story.
Let’s say you make eight 30-second welds during ten minutes of fit-up and welding. That’s four minutes of arc time, or 40%, but you still need to compare the amperage used with the machine’s rating. If those four minutes are all at 200 amps on a machine rated 20% at 200 amps, the pauses between beads don’t automatically make the workload acceptable. Heat still accumulates.
Material thickness gives you a starting point, not a duty-cycle answer. A 1/16-inch stainless joint might use roughly 40–70 amps DCEN, while 3/16-inch aluminum can call for roughly 180–250 amps AC depending on joint geometry, heat sinking, and travel speed. One job barely leans on a 200-amp power source; the other can keep it near its ceiling. Time your longest realistic weld sequence, not your easiest tack-up.
How the Foot Pedal and Pulse Settings Change the Load
Setting the panel to 200 amps usually establishes the maximum available current when you’re using a foot pedal in remote amperage mode. It doesn’t mean every second of the weld happens at 200 amps. You might use nearly full pedal to establish an aluminum puddle, then back off as heat builds in the part. That generally reduces the load compared with staying at full output, but it doesn’t give you a new certified duty-cycle rating.
Pulse Percentage Is Not Machine Duty Cycle
The “pulse duty” or “peak time” setting describes how much of each pulse period is spent at peak current. Machine duty cycle describes the power source’s allowable welding time over its specified thermal test period. Same words, different clocks. Mixing them up can lead you badly astray.
For example, a square-wave pulse alternating between 200 amps and 50 amps with 50% peak time has an average current of 125 amps. Its RMS current is approximately 146 amps, and resistive heating follows RMS current more closely than simple average current. The power source also has switching losses and other heat sources, so neither number lets you calculate its allowable duty cycle directly. Pulse can reduce average load, but it is not permission to treat a 200-amp peak setting as a manufacturer-rated 125-amp operating point.
Your TIG Torch Has a Duty Cycle Too
The power source isn’t the only component that gets hot. Your torch, power cable, connectors, and cooling system also have limits, and the lowest-rated component can stop the job first. A machine capable of sustained 200-amp welding doesn’t make a smaller air-cooled torch suitable for that same workload. A painfully hot handle is a warning, not a badge of honor.
Common WP-style #17 and #26 air-cooled torches are often listed around 150 and 200 amps respectively, while #20 water-cooled torches are commonly around 250 amps. Those are family-level reference points, not universal ratings. Check the actual torch manufacturer’s current, duty-cycle, and AC/DC specifications because flexible heads, cable construction, and test conditions can change the numbers.
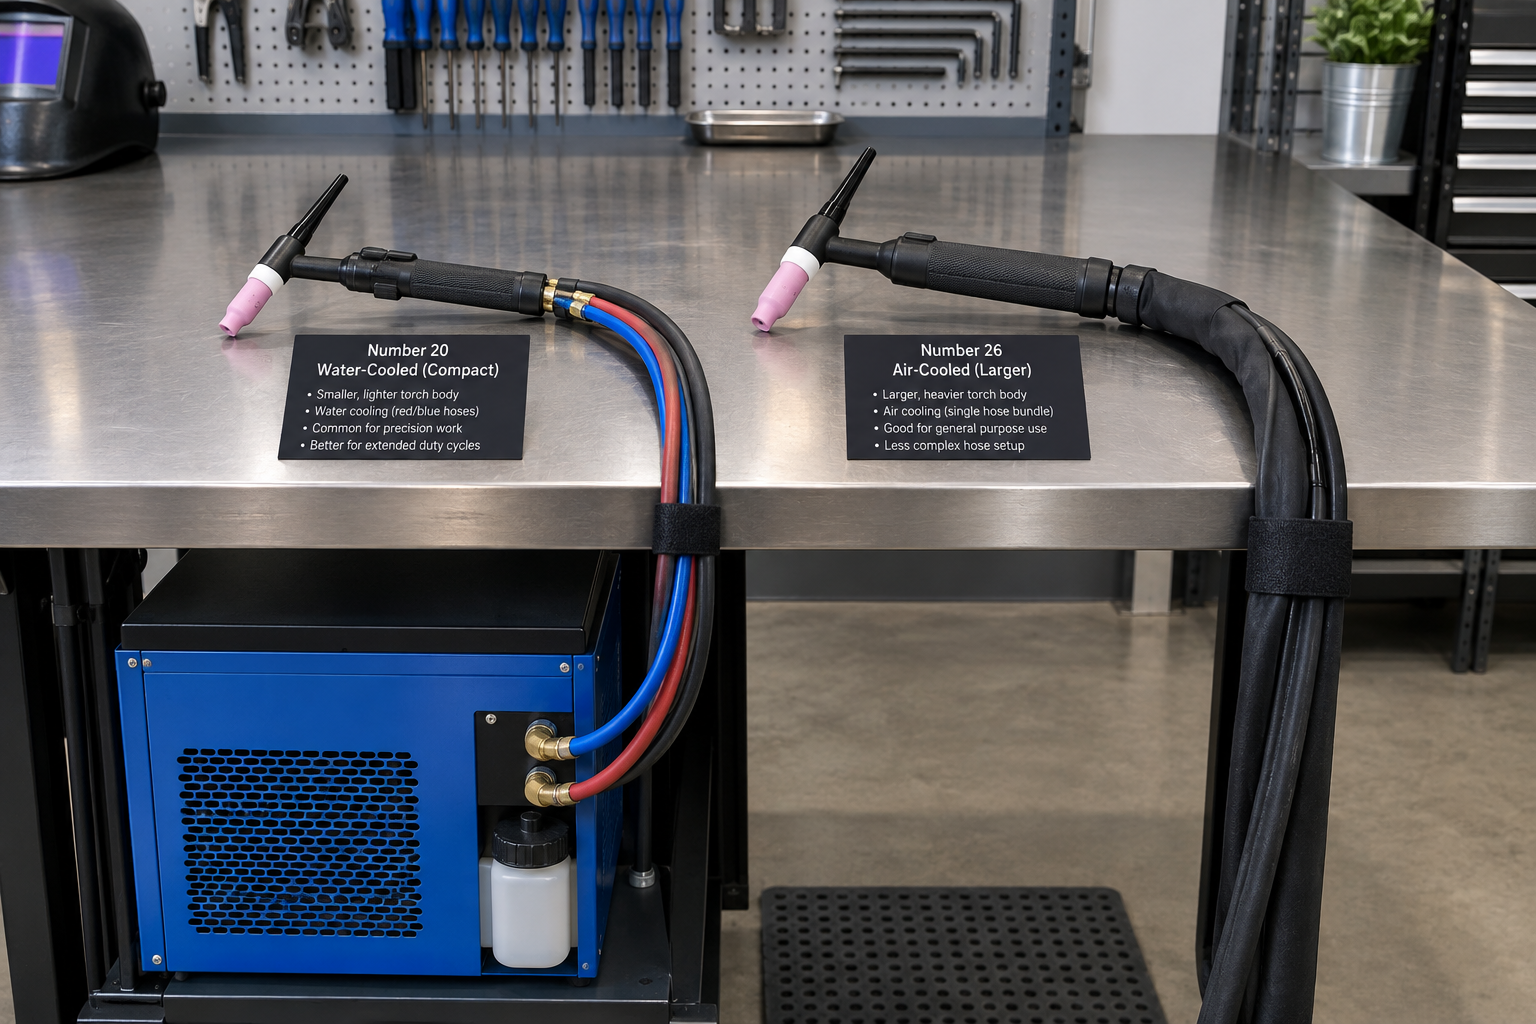
I’d prioritize a properly matched water-cooled setup for repeated high-amperage aluminum work because torch heat can become the practical limit before the welder trips. That means a compatible cooler, manufacturer-specified coolant, sound hoses, and verified flow—not just a reservoir that looks full. Water cooling the torch does not increase the power source’s duty cycle. It fixes a different bottleneck.
Why a Welder Overheats Before You Expect It To
A published rating assumes particular operating conditions, and your shop may be harder on the machine. Hot intake air, obstructed vents, and dust-packed cooling passages reduce its ability to shed heat. Pushing the welder under a bench with its exhaust blowing against a wall can leave it breathing its own hot air. Give it the clearances specified in the manual.
- Keep cooling paths clear: don’t drape a jacket over the case or stack supplies against the intake.
- Control grinding dust: position the machine away from the plume, especially conductive metal dust.
- Maintain it correctly: follow the approved cleaning procedure; don’t remove covers without the required isolation and service precautions.
- Use the specified electrical supply: undersized extension leads and poor connections cause voltage drop and heating, not useful extra capacity.
If thermal protection operates, stop welding and follow the prescribed cooldown procedure. Leave the cooling system operating as directed, and don’t repeatedly power-cycle the machine trying to clear the warning. An overtemperature trip is a protective backstop, not a production timer. Repeated trips under apparently modest loads call for checking operating conditions and, if needed, qualified service.
Choose Enough Duty Cycle Without Buying More Machine Than You Need
I’d rather compare machines at my expected working amperage than rank them by maximum output. For intermittent thin stainless work around 60–100 amps, a modest machine may offer all the thermal capacity you need. For repeated aluminum seams near 200 amps, the rating at 200 amps—and the continuous-output rating—deserves much more attention. A bigger number on the front panel isn’t the verdict.
- Identify the demanding job: record material, thickness, joint type, and AC or DC operation.
- Estimate working current: distinguish brief pedal peaks from sustained welding amperage.
- Time a representative sequence: include the longest continuous bead and total arc-on time over ten minutes.
- Compare published ratings: match supply voltage, process, ambient temperature, and actual output.
- Check the whole system: include torch capacity, cooler requirements, electrical supply, and some operating margin.
For short repairs and fabrication with plenty of fitting between welds, a lower maximum-output duty cycle can be a sensible trade for cost and portability. For production work where another part is ready as soon as the last bead ends, more thermal capacity buys useful working time. You want the machine waiting on your fit-up—not you waiting on its fan.