How to TIG Weld in Low Light Conditions: 7 Fixes for a Clearer Puddle
How to TIG Weld in Low Light Conditions: 7 Fixes for a Clearer Puddle
A TIG arc can light up the puddle while leaving the joint ahead of it almost invisible. That’s how you end up with a decent-looking bead running beside the seam, or a tungsten dipped into filler you couldn’t quite see. Turning the machine up won’t fix that, and turning your helmet shade down isn’t automatically the answer either.
Learning how to TIG weld in low light conditions means sorting out three separate things: illumination before the arc starts, a usable view while welding, and enough surrounding light to work safely. Here’s how I’d tackle them, from lamp placement to the final inspection.
1. Light the Joint Without Putting Glare in Your Helmet
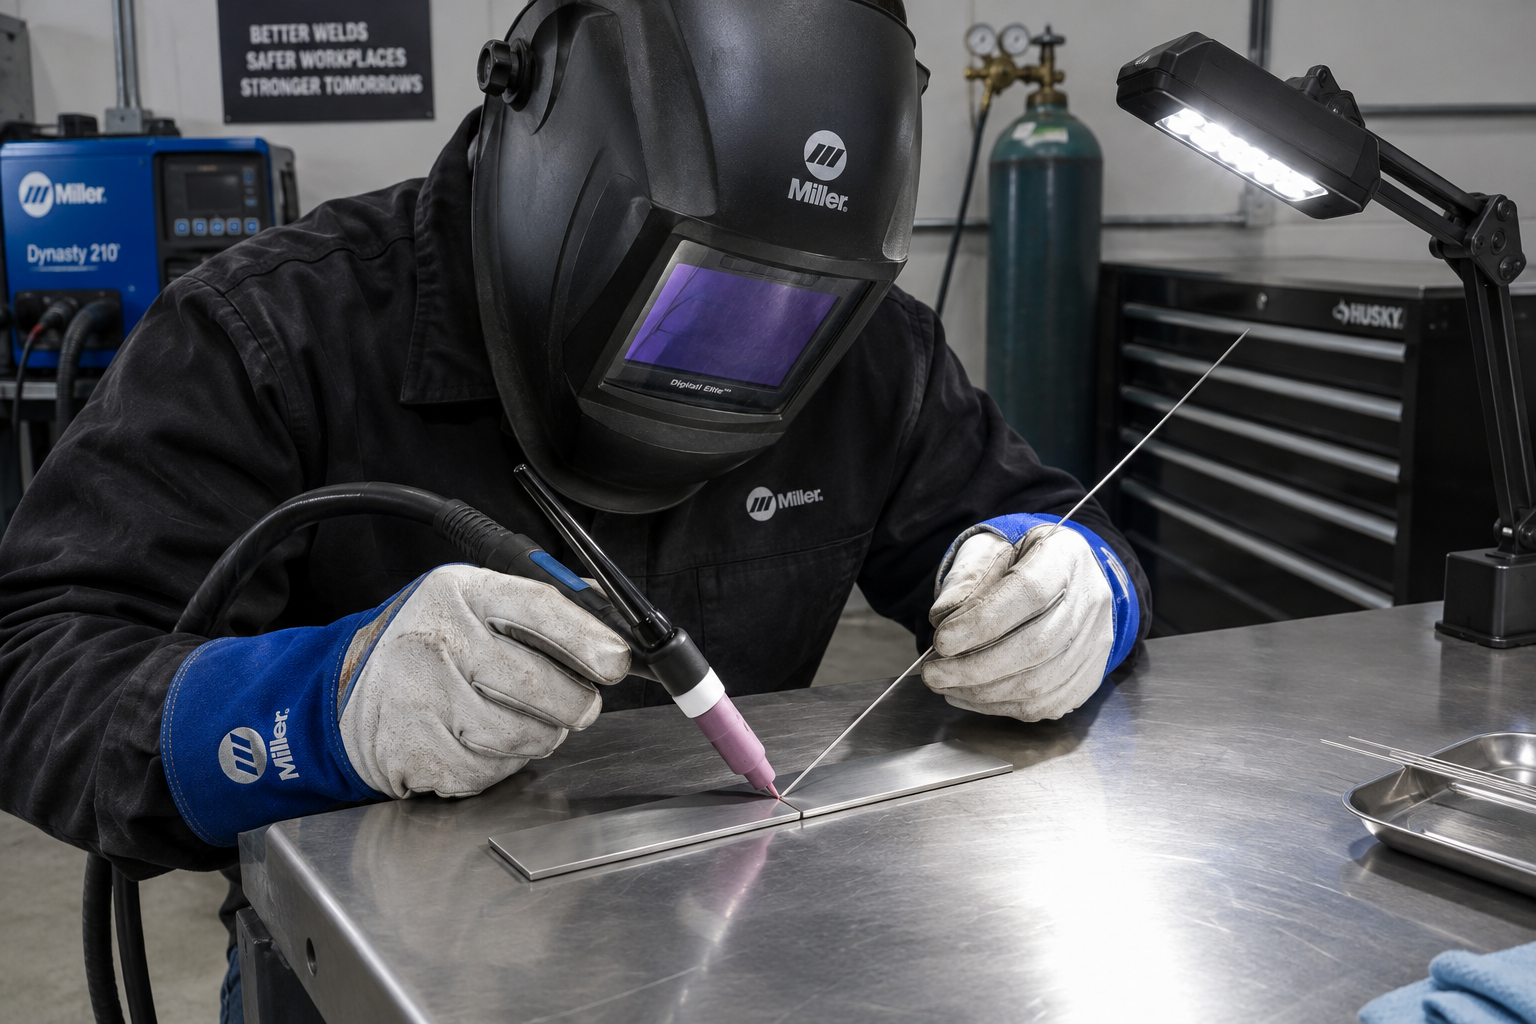
Put your task light off to one side of the joint and aim it across the surface, not straight back toward your face. A shallow angle gives a butt joint or fillet root enough contrast to follow, but shiny stainless and aluminum can throw that light right back into your lens. Move the lamp until the seam becomes clearer without a bright reflection sitting where the puddle will be. Check this from your actual welding position, with your hood down.
A practical starting point is roughly 500–1,000 lux at the work surface before welding, adjusted for the material and detail you need to see. That’s a setup target, not a universal welding requirement. Lumens on the box only describe the lamp’s output; distance, beam spread, and angle determine how much useful light reaches the joint. A broad, adjustable LED task light usually works better than a narrow flashlight hotspot.
- Start with the lamp about 30–45 degrees off your viewing line. Then adjust for reflections and torch shadows.
- Light the surrounding bench too. You need to see the filler rack, hot parts, and pedal without hunting around.
- Keep lights and cords out of the heat zone. Protect them from hot filler ends, dropped parts, and traffic.
- Check the full weld path. Your glove or torch can block a lamp that looked perfectly placed at the starting tack.
2. Choose a Helmet That Stays Dark at Your Actual TIG Current
Low-amperage TIG is a demanding job for an auto-darkening filter, especially when a pipe, fixture, or your own hand blocks its sensors. Check the helmet manufacturer’s minimum TIG amperage rating, not just its switching-speed claim. Some filters are rated down around 2–5 amps, but that doesn’t guarantee reliable operation with covered sensors. For pulsed TIG, consider the background current as well as the peak.
Set shade, sensitivity, and delay separately
Shade controls how dark the filter becomes; sensitivity controls how readily it detects an arc; delay controls how long it stays dark after the arc stops. They solve different problems. For reference, the OSHA welding-filter table lists suggested shades of 10 below 50 amps, 12 from 50–150 amps, and 14 from 150–500 amps for gas tungsten arc welding, with minimum protective shades of 8, 8, and 10 respectively. Follow the applicable safety guidance and helmet instructions, starting darker and adjusting without going below the required protection.
- Sensitivity: Increase it as needed for low-current TIG, following the manual. If shop lighting triggers the filter, reposition that light before backing sensitivity off too far.
- Delay: A longer setting may help prevent reopening between pulses or during the final current downslope, within the filter’s capabilities.
- Operating mode: Confirm the helmet is in weld mode, not grind mode, before striking an arc.
- Power and sensors: Check batteries, sensor cleanliness, and the manufacturer’s recommended function test.
If the filter flickers or unexpectedly goes light during welding, stop and correct the problem. Don’t keep going because you can still make out the puddle. A compliant filter’s UV/IR protection does not make visible flashing acceptable. A fixed-shade helmet avoids electronic switching problems, but you’ll need better task lighting to position the tungsten before lowering it.
3. Clean the Viewing Path Before Buying More Equipment
A scratched cover lens scatters the arc into a bright haze, and low ambient light makes that haze especially annoying. Inspect both the outside and inside cover lenses, along with your safety glasses or prescription lenses. Replace pitted covers rather than trying to polish welding damage out of them. I’d do this before spending money on a brighter lamp or another helmet.
Light entering behind the helmet can also reflect off the inside lens and wash out your view. Turn or reposition the work so a lamp isn’t shining into the back of the hood. Where needed, use a manufacturer-compatible, flame-resistant helmet shroud without blocking ventilation or interfering with other PPE. Don’t drape an ordinary shop rag over your head. That’s trading one problem for another.
As far as magnification goes, a correctly selected cheater lens can make the puddle edge easier to distinguish, but it changes your useful working distance. Check that you can focus with your arms supported rather than leaning your face into the plume. Keep required safety glasses on under the helmet, and correct fogging through suitable ventilation and manufacturer-approved lens care. More light won’t clear condensation.
4. Open Up the View With Torch Position and Gas-Lens Setup
If all you can see is the cup, the lighting isn’t the only problem. On an accessible flat joint, start with the torch around 10–15 degrees off perpendicular and arrange your head position so you can see the leading edge of the puddle. Too much torch angle spreads the arc’s footprint and can compromise shielding. Move your seat, rotate the part, or change your support before laying the torch way over just to see around it.
Use tungsten stickout for access, not as a cure-all
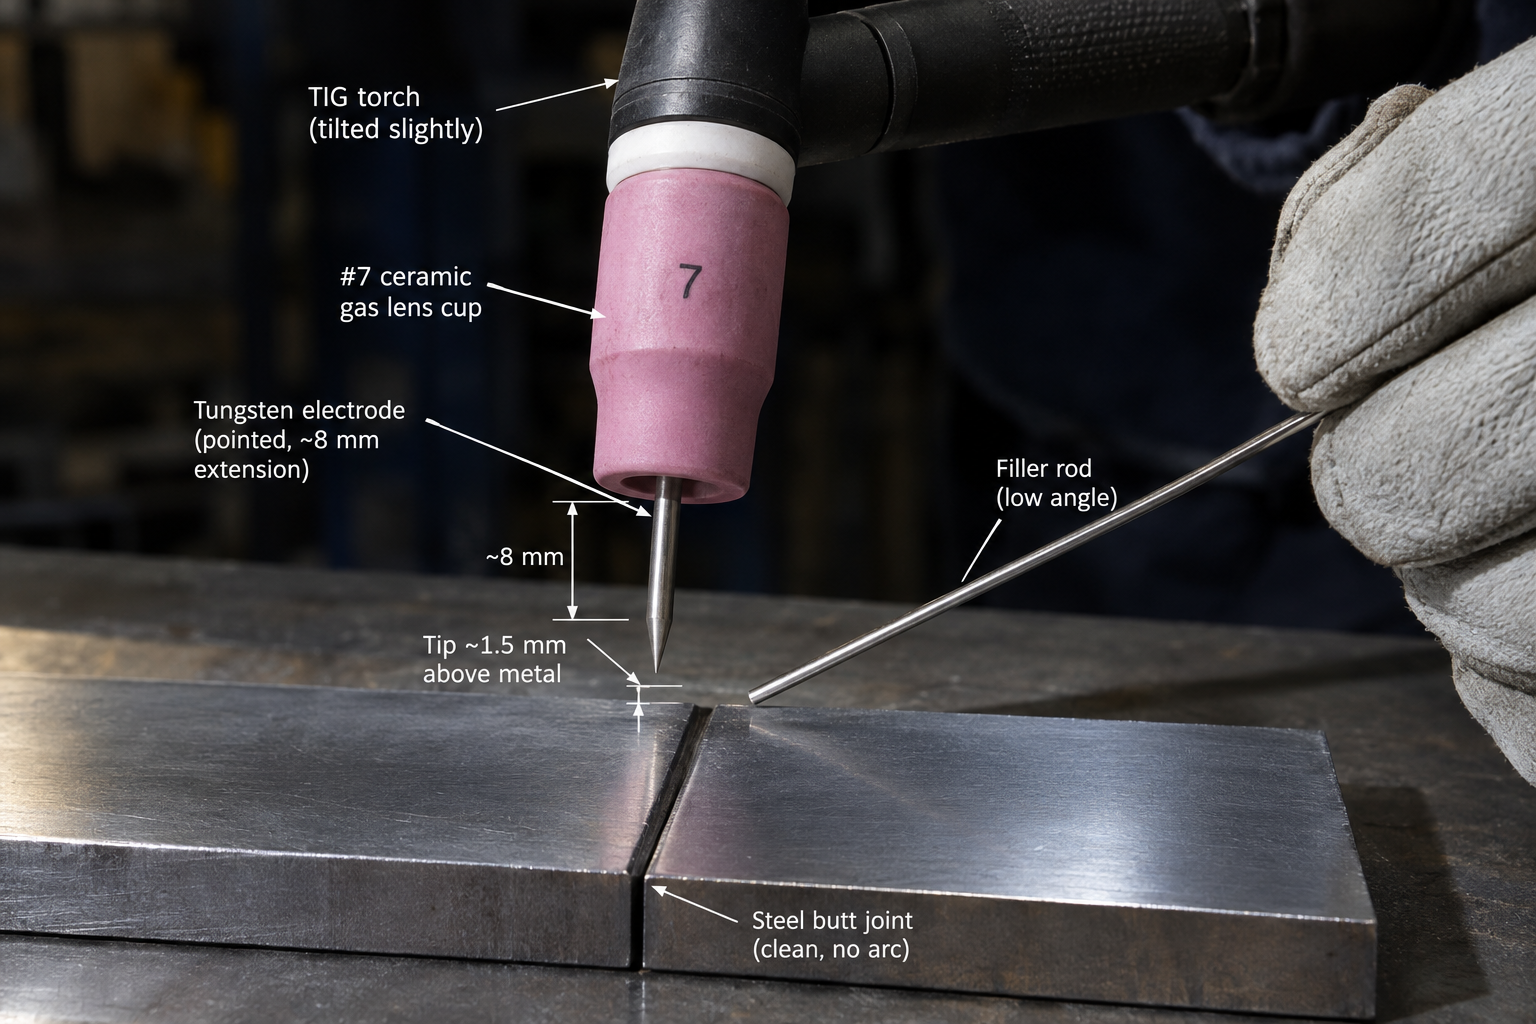
A gas lens smooths shielding-gas delivery and can allow more tungsten extension than a conventional collet body under suitable conditions. For a bench practice setup, a #7 cup has a 7/16-inch bore, and roughly 1/4–3/8 inch of stickout can provide useful visibility with a gas lens. Around 12–18 CFH of argon is a reasonable starting range for that arrangement in still air, not a guarantee for every joint. Cup size, access, drafts, and actual weld condition decide whether the coverage is adequate.
More stickout doesn’t mean you should run a longer arc. Keep the tungsten tip roughly 1–2 mm from the work on a small sheet-metal puddle, adjusting for the joint and procedure. Excessive argon flow can create turbulence and pull air into the shielding envelope, so don’t crank up the flowmeter to compensate for bad positioning. Keep drafts off the weld without disabling required fume extraction.
5. Dial In the Arc on Scrap Before Starting the Real Weld
Use a coupon of the same material, thickness, and joint style to check your view while welding. A lamp can make an unlit joint look excellent and still produce an awkward reflection once the arc starts. You want to identify the puddle’s leading edge, both joint edges, and the filler tip without searching for them. If one disappears, fix the sightline before changing welding parameters.
For example, on a closely fitted, flat butt joint in 1.6 mm mild steel, a machine maximum around 60–90 amps DCEN gives a useful practice range with pedal control. A 1/16-inch lanthanated tungsten and 0.045–1/16-inch ER70S-2 filler are reasonable choices for clean, uncoated material. Fit-up, travel speed, and heat sinking will change the current you actually use. This is a visibility-check setup, not a substitute for a qualified welding procedure.
Start with steady current if you’re troubleshooting the view. Pulse can help control heat, but a slow pulse around 1–2 pulses per second also changes puddle brightness noticeably, and some helmet setups don’t handle the low-current intervals well. Establish a stable view first, then add pulse if the work benefits from it. Don’t increase current just to make the seam brighter; thin material will punish that idea quickly.
6. Keep the Filler, Seam, and Pedal Where You Can Find Them
Dry-run the whole weld with the arc off and the task lighting in its final position. Rest your torch hand where it can slide or pivot without catching, then feed enough filler to check your hand position at the far end. You don’t want to discover halfway through a stainless corner that your wrist has run out of travel. Shorter, controlled runs beat a long bead finished by feel.
- Clean and fit the joint. Remove oil, oxide, and coatings using the appropriate material-specific preparation. Don’t use a marker line as a substitute for seeing the actual seam.
- Place useful tacks. Keep the joint aligned and position starts where you can clearly distinguish the tack from the surrounding metal.
- Organize filler. Put clean rods in a holder within easy reach, with their ends out of walkways and away from your face.
- Stabilize the pedal. Set it on a dry, secure surface where your foot can modulate current without chasing it.
- Inspect between runs. Use the task light to check bead placement, undercut, oxidation, and tungsten condition.
Keep the filler close enough to the shielding envelope to protect its hot end, but clear of the tungsten. In poor visibility, feeding from too high an angle makes it easier to cross the electrode and contaminate it. If you dip, stop and prepare the tungsten again. Trying to burn the contamination off usually turns a small interruption into a longer repair.
7. Set a Stop Point for Unsafe Low-Light Work
If you can see the puddle but can’t see the floor, your lighting setup isn’t finished. Route the torch lead, work lead, and lamp cords so they don’t create a trip loop around your feet. Maintain screens to protect other people from the arc, and make sure those screens haven’t hidden the exit or fire extinguisher. Portable lights need to suit the environment, with appropriate electrical protection wherever required.
Dark outdoor work adds wind, moisture, and uneven footing to the visibility problem. Stop if rain, standing water, unstable access, or uncontrolled drafts prevent safe operation or adequate shielding. Inside a tank or other confined space, a brighter lamp does nothing about argon displacement or atmospheric hazards; that work needs the proper confined-space controls. Light is only one part of the setup.
Before the production weld, make one short test and inspect it under good white light. If you can follow both joint edges, control the puddle, and see where your filler enters, you’re ready to work. If you’re guessing where the seam went, reposition the light or the job. The arc is not a work lamp.