TIG Welding For Beginners: Step-by-Step Setup Guide
TIG gives you more control than any other common process, and it asks for more in return. This guide is written for someone starting from zero: it explains what the machine does, what gear you actually need, how to hold and move the torch, how to run your first beads and joints, and the handful of mistakes that trip up almost everyone. Work through it in order the first time, then use it as a checklist. Where a topic has its own detailed article, this guide summarises the beginner-level version and links out.
What TIG is (and how it differs from MIG and stick)
TIG stands for Tungsten Inert Gas welding; the formal name is Gas Tungsten Arc Welding (GTAW). An electric arc jumps from a non-consumable tungsten electrode to the metal, melting a small pool. A stream of inert gas — almost always argon — shields that pool from the air so it does not oxidise. If the joint needs more metal, you dip a separate filler rod into the pool with your other hand.
The practical difference from MIG and stick is that the heat and the filler are separated. In MIG the wire is the electrode and it feeds automatically; in stick the rod burns down as you go. In TIG you control the heat with a foot pedal or torch control, and you add filler only when and where you want it. That is why TIG is clean, precise, and good on thin material — and why it has a steeper learning curve. If you are still deciding whether TIG is the right process for you, the comparisons of TIG versus MIG and TIG versus stick lay out the trade-offs; the rest of this guide assumes you have chosen TIG.
The TIG machine and the controls you'll use
A TIG-capable inverter has more knobs than you will touch at first. The ones that matter on day one:
- Process / polarity: DC or AC, and within DC, electrode negative (EN) or positive (EP). Beginners join steels on DCEN (see below).
- Amperage: your heat. Set a maximum on the machine and meter the actual current with the pedal.
- Gas pre-flow / post-flow: argon flows for a moment before the arc and, importantly, for several seconds after, shielding the hot tungsten and cooling the weld.
- High-frequency (HF) start: lets the arc start without the tungsten touching the metal. Leave it on.
- Slope (up/down): ramps current in at the start and tapers it out at the end so you do not blast the start or leave a cracked crater.
For a full reference on every parameter and sensible starting values by metal and thickness, keep the complete guide to TIG settings open alongside this one.
DC, AC, and why you'll start on DCEN
DC current flows one direction; AC alternates. Aluminium and magnesium need AC because the alternating current also breaks up the tough oxide layer on those metals. Everything else a beginner is likely to weld — mild/carbon steel, stainless, and most others — runs on DC electrode negative (DCEN), where the torch is negative and the work is positive. DCEN puts roughly two-thirds of the heat into the workpiece for good penetration and keeps the tungsten relatively cool, so it lasts and stays sharp. Start on DCEN with steel; the fuller explanation of polarity is in DCEN vs DCEP, and the AC side is covered in AC vs DC in TIG welding.
The equipment a beginner actually needs
You do not need a fully kitted shop to learn. The short list:
- A DC TIG welder with HF start and a foot pedal. AC output is only worth paying for if you know you will weld aluminium. (Choosing a first machine is its own topic — how to pick a TIG welder for your projects covers what to look for.)
- An argon regulator/flowmeter and a bottle of pure argon.
- Tungsten electrodes — a few 3/32 in (2.4 mm) and 1/16 in (1.6 mm) to start; 2% lanthanated (blue) is the easy all-round choice.
- A means to sharpen tungsten — a dedicated grinding wheel or, better, a tungsten grinder.
- Filler rod to match your practice metal — ER70S-2 for mild steel, in 1/16 in and 3/32 in.
- Consumables for the torch: collets, collet bodies, gas cups (a #6 to #8 to begin), and a gas lens kit is a worthwhile early upgrade.
- PPE: an auto-darkening helmet set around shade 10–12, thin TIG gloves for torch-hand feel, natural-fibre long sleeves, safety glasses under the hood.
- Clean-up tools kept stainless-only: a wire brush and abrasives that never touch other metals.
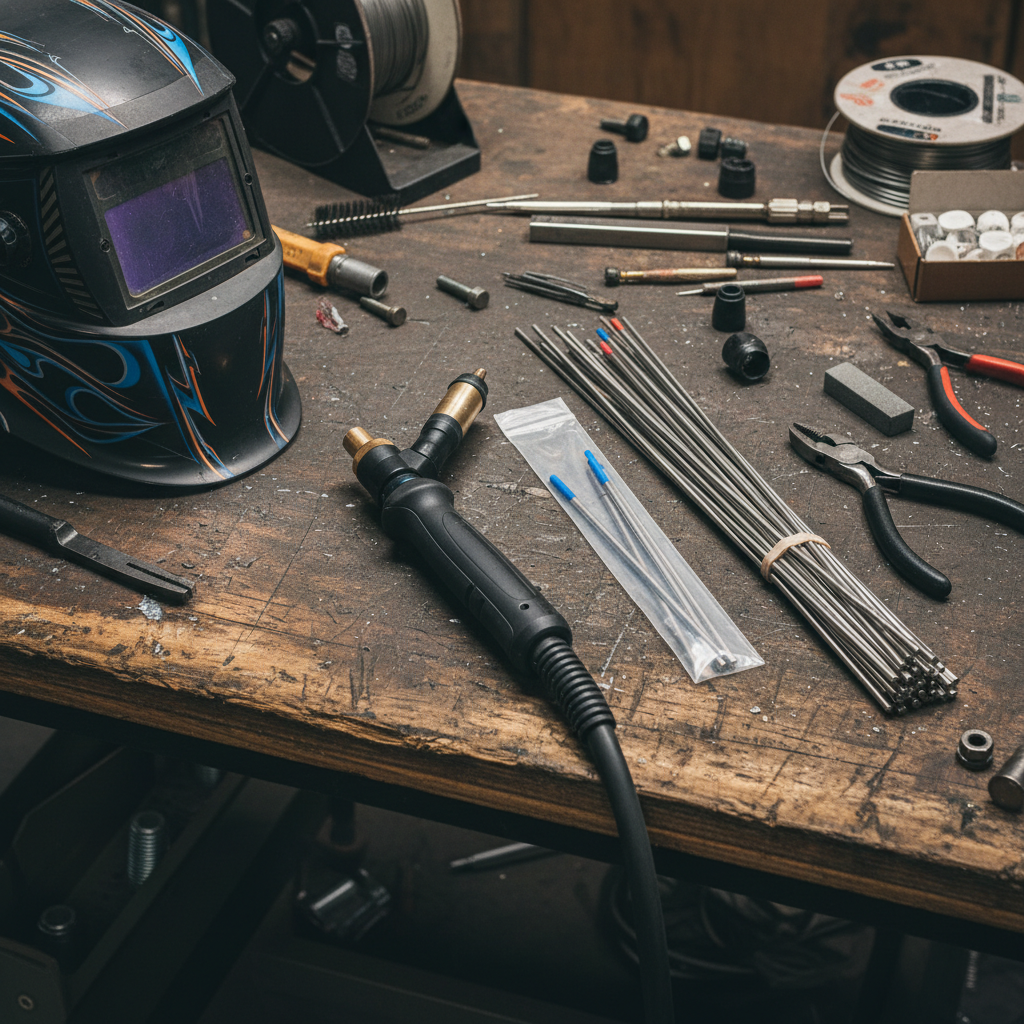
The torch itself is simple: a tungsten held in a collet inside a collet body, surrounded by a ceramic gas cup, with a cap at the back covering the tungsten stub. Gas comes through the body and out around the tungsten. A gas lens replaces the collet body with a screened version that smooths the gas flow and lets you stick the tungsten out further to see the puddle.
Tungsten: choosing it and sharpening it
For DC steel and stainless work, 2% lanthanated (blue) tungsten is the modern default: it starts easily at low current, holds a point, and is not radioactive like the older thoriated (red) type. Match the diameter to the current — 1/16 in up to roughly 90 A, 3/32 in for about 90–200 A.
Grind a long, pointed taper about 2 to 2.5 times the electrode diameter, with a tiny flat on the very tip so it does not melt off. Grind lengthwise along the electrode, not around it — circular grind marks make the arc wander. Keep a dedicated wheel for tungsten only. Stick the tungsten out past the cup about one electrode diameter with a standard cup, or up to 1/2 in with a gas lens. If you ever dip the tungsten into the puddle or filler, stop, snip off the contaminated tip, and regrind — a contaminated tungsten will never give a stable arc. The tungsten selection guide covers the other alloys and metals.
Filler rod basics
Filler adds metal to the joint and, on many joints, is what makes the weld strong rather than just fused. Match it to the base metal: ER70S-2 for mild steel, ER308L for 304 stainless, ER4043 or ER5356 for aluminium. Rod diameter should be roughly the thickness of the metal or a little less — 1/16 in rod for thin sheet, 3/32 in for heavier work.
Keep the rod clean; wipe it with acetone the same as the joint. Cut long rods so the far end does not whip around behind you. When you weld, keep the hot end of the rod inside the gas shield at all times — pulling it out into the air lets it oxidise and carry contamination back into the pool. There is more on choosing and using filler in the role of filler rods in TIG welding.
Shielding gas and gas flow
Run 100% argon for everything as a beginner. The job of the gas is to keep air off the tungsten and the molten pool until they cool; if it fails, you get porosity, a dirty grey weld, and a tungsten that oxidises fast.
Flow rate depends on cup size and drafts, not one number. Indoors with a #6–#8 cup, start around 12–18 CFH (6–8 L/min); a larger cup or a gas lens wants a little more. More is not better — past about 20 CFH on a small cup the flow turns turbulent and actually pulls air in. Block fans and open doors, keep the hose short and leak-free, and set a post-flow of roughly one second per ten amps so the weld stays shielded as it solidifies. The argon flow-rate guide gives settings by cup and joint, and the science of shielding-gas coverage explains why laminar flow matters.
Amperage, the foot pedal, and the work clamp
Amperage is heat. A rough starting point on DCEN steel is about 1 amp per 0.001 in of thickness — roughly 40 A for 1 mm (0.040 in), 90–100 A for 2.5 mm (0.100 in) — then adjust by what the puddle does. Set the machine maximum a bit above what you expect so the pedal has room.
The foot pedal is a live amperage control: press to add heat, ease off to reduce it. You will spend the first hour learning to feather it — press just enough to start a puddle, hold to travel, and taper off at the end to fill the crater. If a pedal is awkward for your setup, a thumb control on the torch does the same job.
The work clamp (ground) completes the circuit. Clamp it to clean bare metal as close to the weld as practical — paint, rust, or a far-away clamp cause a weak or wandering arc.
Cleaning, preparation, and joint fit-up
TIG is unforgiving of dirt. Before you strike an arc: remove mill scale, rust, paint, and oil for about an inch on each side of the joint. Mechanically clean to bright metal with a dedicated brush or fresh abrasive, then wipe with acetone on a clean rag (never a chlorinated brake cleaner — the arc's UV turns it into poison gas). Do the same to the filler rod. Our walkthrough on cleaning metal for TIG covers the full sequence.
Fit-up is how well the parts meet. Aim for tight, even contact with no gap. Gaps force you to add heat and filler to bridge them, and every extra bit of heat goes into distortion. Hold parts with clamps or magnets, and tack them — small quick welds at the ends first, then spaced along the joint — before you run the finish pass.
Torch angle, arc length, and travel speed
These three, plus the pedal, are the whole game:
- Torch angle: tip the torch about 10–15° away from vertical, leaning back toward the finished weld so the gas blankets the pool ahead of you (a "push" angle).
- Arc length: keep the tungsten close — about one tungsten diameter off the metal (roughly 1/16–3/32 in). A long arc spreads the heat, wastes gas coverage at the edges, and makes the arc wander.
- Travel speed: move just fast enough to keep the puddle a consistent size. If it swells and the metal glows further out, speed up or ease the pedal; if it will not form, slow down or add heat.
Steady your torch hand — brace your little finger on the work, rest your forearm, or drag a cup. Small lifts and wobbles of a hovering hand are what widen the heat-affected zone and add oxidation.
Your first arc: striking it and building a puddle
Set the machine to DCEN, argon on, a scrap of clean 1/8 in (3 mm) mild steel clamped down with the ground close by. Bring the tungsten to about 1/8 in off the plate, dip your helmet, and press the pedal a little. With HF start the arc lights across the gap. Hold the torch still and add heat until a small, shiny puddle forms and wets out into a circle a few millimetres across — that shiny, liquid look is what you are learning to recognise.
Once you can make a puddle on demand, move it: hold the puddle, travel slowly and evenly along a straight line, and watch the trailing edge freeze behind you into a row of ripples ("stacked dimes"). That is an autogenous (no-filler) bead. Run twenty of them until they are straight and even before you pick up a rod.
A practice progression: beads, then joints
Learn in this order — do not skip ahead:
- Autogenous beads on flat plate: straight lines, consistent ripple, no filler.
- Beads with filler: add small dabs of rod to the leading edge of the puddle in a steady rhythm — dip, withdraw (staying in the gas), travel, dip again. Aim for a slightly raised, even bead.
- Outside corner joint: two plates in an L, joined on the outside. Good for learning heat control because there is nowhere for heat to hide.
- Lap joint: one plate overlapping another; teaches you to balance heat between a thick and a thin edge.
- T joint (fillet): one plate standing on another. The stepping-stone to real fabrication.
- Butt joint: two plates edge to edge, eventually with full penetration you can see on the back.
Practice materials
Start with mild steel: it is cheap, forgiving of heat, and shows you clearly when a weld is too hot or too cold. Use 1/8 in (3 mm) flat bar and sheet offcuts. Move to thinner steel (16–18 gauge) to learn pedal finesse, then to stainless once your beads are consistent. Save aluminium for after you have AC-capable equipment and solid DC technique. For structured practice ideas, see TIG projects to practice your skills.
The mistakes almost every beginner makes
Recognising these early saves weeks. The full catalogue is in 10 mistakes beginners make in TIG welding; the core few:
Contamination and dipping the tungsten
Touching the tungsten to the puddle or the filler rod instantly contaminates it — the arc turns fuzzy and wanders, and the weld picks up tungsten inclusions. The fix is not to weld through it: stop, break or grind off the contaminated tip, regrind the taper, and carry on. Keeping a slightly longer arc and feeding filler low and flat prevents most dips.
Porosity
Tiny holes in the bead mean air reached the pool: gas flow too low or turbulent, a draft, a leak in the line, or oil/paint left on the metal. Set a calm flow for your cup, block drafts, leak-check the hose, and re-clean the joint and rod.
Overheating and distortion
Thin steel that warps, sinks, or blows through is taking more heat than it needs. Travel faster, ease the pedal, shorten the arc, tack more often, skip around a long seam instead of running it end to end, and clamp a copper or aluminium bar behind thin sheet to pull heat out.
Basic troubleshooting
- Arc will not start / keeps going out: HF off, work clamp on paint or rust, tungsten too far from the metal, or gas not flowing. Check each.
- Arc wanders or is fuzzy: contaminated or wrongly ground tungsten, tungsten stuck out too far, or a dirty gas lens. Regrind lengthwise, shorten stickout, clean the parts.
- Grey, sooty, or straw-then-blue coloured weld: too much heat and/or lost shielding. Less current, faster travel, tighter arc, longer post-flow.
- Weld sits on top and will not fuse: not enough heat, or moving too fast — add current or slow down until the toes wet in.
- Rod sticks to the tungsten or the plate: arc too short or puddle not established — make a proper puddle first, then feed the rod into its leading edge.
For a deeper diagnostic tree covering cracks, undercut, and inclusions, use how to fix common TIG weld defects.
Your first session: a setup checklist
- Argon bottle open; regulator/flowmeter set to ~15 CFH for a #7 cup.
- Machine: DCEN, HF start on, foot pedal plugged in, post-flow ~8–10 s, max amps set with headroom (about 100 A for 1/8 in steel).
- Tungsten: 3/32 in 2% lanthanated, ground to a long point with a tiny flat, stuck out ~1 diameter, torch reassembled snug.
- Filler: ER70S-2, 1/16 in, wiped with acetone, long end trimmed.
- Metal: clean 1/8 in mild steel, brushed and acetone-wiped, clamped down, work clamp on bare metal nearby.
- PPE on: helmet ~shade 11, gloves, sleeves, glasses. Fan and drafts off.
- Run autogenous beads until straight and even, then add filler, then move to an outside-corner joint.
Safety essentials
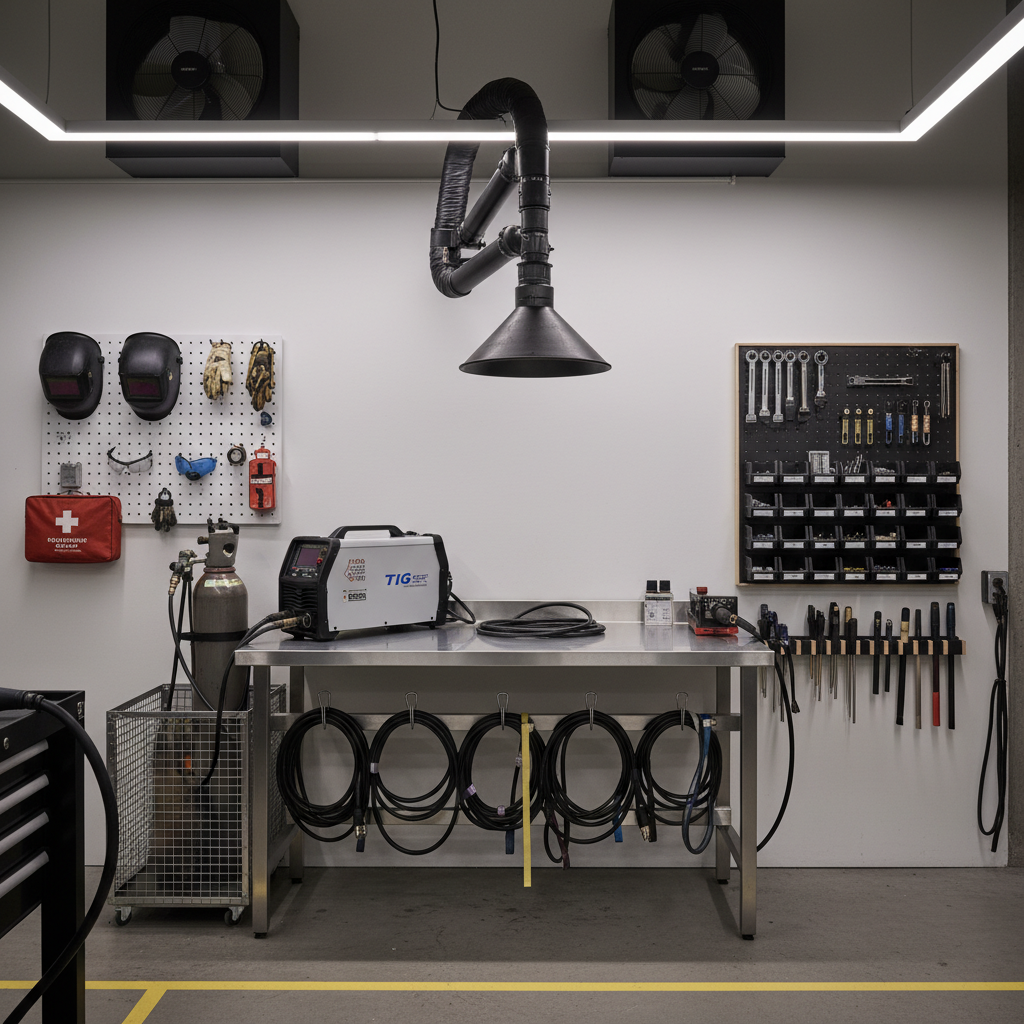
TIG's arc is a strong ultraviolet source — cover all skin, and never let a bystander watch unshielded. Weld only in a ventilated space; the fumes from some coatings and metals are genuinely hazardous. Never use chlorinated solvents (brake cleaner) near the arc. Keep a fire extinguisher within reach and clear flammables from the area. The full rundown is in mastering TIG welding safety.
Where to go next
Once your beads and simple joints on mild steel are consistent, deepen technique with how to TIG weld mild steel the right way and its companion for the same metal, TIG welding carbon steel tips for beginners. When you move to stainless, TIG welding stainless steel like a pro covers what changes. Dial in numbers with the settings guide.
If you would rather learn the whole process in one place, Everything You Need to Know About TIG Welding takes the same ground — machine, metallurgy, technique, practice — from the fundamentals up in the depth a full book allows, which is the better fit while you are still building the basics.