How To Get Mirror-Finish TIG Welds
How to Get Mirror-Finish TIG Welds
What “Mirror-Finish” Means in TIG Welding
A mirror-finish TIG weld is bright, reflective, and free of oxidation, soot, and heat tint. It shows tight, consistent ripples and a smooth toe transition with no undercut, porosity, or haze. While the base metal and filler alloy influence color, the hallmark of a mirror finish is excellent gas shielding combined with precise heat control. On stainless steel, that means no straw, blue, or gray discoloration; on aluminum, it means a clean, glassy bead without black soot. Achieving this level of finish is equal parts preparation, setup, and technique.
It’s also important to set expectations by application. Structural code work prioritizes penetration and soundness first, while high-end fabrication for food, pharma, motorsports, or show pieces may push for the shiniest possible as-welded appearance. The same fundamentals apply to both, but mirror-finish results demand extra care in cleanliness, shielding, and thermal management. With a repeatable process, you can produce beads that photograph beautifully and perform in service.
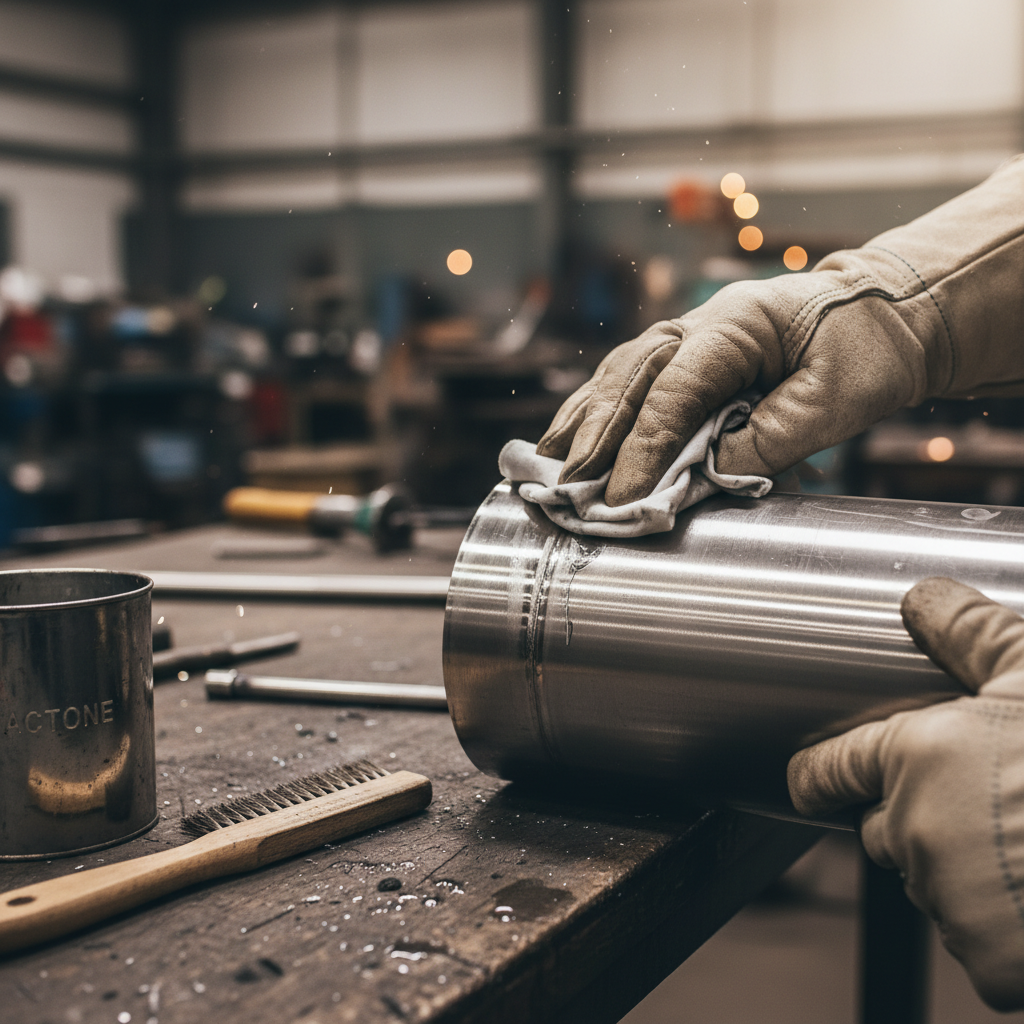
Prep Work: Clean Metal, Fit-Up, and Purging
Cleanliness sets the ceiling for your finish. Degrease both sides of the joint with a suitable solvent, then mechanically clean to bright metal using dedicated stainless or aluminum brushes, non-contaminating abrasives, or plastic media. Remove oxides at the weld zone; for aluminum, stainless, and nickel alloys, oxide films interfere with puddle wetting and drive discoloration. Keep hand oils and shop dust off the joint once cleaned, and handle parts with clean gloves. The cleaner the inputs, the shinier the output.
Tight, accurate fit-up reduces heat input and improves bead appearance. Aim for consistent gaps, good alignment, and solid tacks placed so they’re fully consumed during welding. For stainless, titanium, and nickel-alloy roots, back purging is non-negotiable if you want mirror-bright interiors—use argon with proper dams and target oxygen under 50–100 ppm for a bright silver root. Seal leaks in purge dams with foil tape or clay, let purge stabilize before striking an arc, and keep purge flowing until the weld drops below oxidation temperature. Good prep saves you from chasing color later.
- Degrease, then mechanically clean to bright metal with dedicated tools
- Maintain glove-only handling after prep; avoid fingerprints and shop dust
- Use tight fit-up and small, fully consumed tacks
- Back purge stainless and reactive alloys; verify low O2 before welding
Equipment Setup: Torch, Tungsten, Gas, and Power Source Settings
Shielding gas quality and delivery make or break a mirror finish. Use high-purity argon (99.99% when possible) and leak-check hoses, torch fittings, and regulators. A gas lens with a large cup (#8–#12 alumina or specialty gas-saver cups) promotes laminar flow and wider coverage, which keeps the puddle and hot metal shielded as you move. Start around 15–20 CFH with standard cups and 20–30 CFH with large gas-lens cups; increase only if coverage is insufficient, as excess flow can cause turbulence and draw air into the envelope. Add 0.5–1.0 seconds of pre-flow and at least 1 second of post-flow per 10 amps of welding current to protect both puddle and tungsten.
Shielding gas strategy
For mirror-finish stainless and thin nonferrous work, pure argon generally yields the cleanest appearance. Helium blends increase heat input and travel speed on thick aluminum but can alter bead etch and color; use them selectively. Trailing shields and large gas lenses are invaluable when chasing high gloss on stainless and titanium, particularly on long beads where the tail of the weld stays hot. Keep your work area draft-free—fans, open doors, and compressed-air blow-off will sabotage shielding no matter how good the torch setup looks on paper.
Tungsten geometry and cup choice
Use 2% lanthanated or 1.5% lanthanated tungsten for most mirror-finish work. On DC (stainless, carbon steel), grind longitudinally with a fine finish (120–320 grit) to a point or a slight truncated tip; a consistent grind stabilizes the arc and tightens bead profile. On AC (aluminum, magnesium), a pointed tungsten that forms a small, clean hemisphere under AC is ideal; run higher frequency to keep the tip stable. Choose cups that balance coverage and access: #8–#10 gas-lens cups for general work and #12 for wide, forgiving shielding when finish is critical. Keep tungsten stickout short and the arc length at or below the tungsten diameter for a crisp, reflective puddle.

- Gas: high-purity argon; 15–30 CFH depending on cup and access
- Gas lens and large cups for laminar, wide coverage
- Pre-flow: 0.5–1.0 s; post-flow: ≈1 s per 10 A (increase for tungsten size)
- Lanthanated tungsten; fine, longitudinal grind; minimal arc length
Heat Input and Arc Control for Shiny Beads
Mirror-finish TIG is about giving the metal just enough energy to fuse and wet out—no more. Control heat with a foot pedal or fingertip control, maintain a short arc, and keep the torch angle shallow (10–15 degrees push). A long arc diffuses shielding and roughens the puddle surface, reducing gloss. Use brisk, steady travel to limit heat tint on stainless and prevent magnesium-rich aluminum from sooting. Allow interpass cooling and respect temperature limits: for stainless, try to keep interpass under about 300°F (150°C) to minimize color.
Pulse TIG for appearance
Pulse settings can tighten the puddle and create consistent ripple spacing with lower overall heat input. For aesthetic stainless fillets, try 1–2 Hz with 25–40% background current and a modest peak time (30–50%). For thin sheet or precise beads, high-frequency pulsing (100–200 Hz) with lower amplitude creates a glassy surface and sharp edges. Adjust pulse to your travel speed—your dabs should land on or near the pulse peaks for a distinct, clean pattern. Too much background drop can chill the puddle and make feeding jerky; tune until the bead flows without color.
AC tuning for aluminum
On aluminum, set AC balance to favor EN (70–75% EN on many inverters) for deeper penetration and less aggressive oxide etch, which helps with a clean, shiny face. Increase AC frequency to 120–200 Hz for a tighter, more directional arc that produces crisp toes and reduced smearing. Avoid excessive amperage and dwell, which vaporize magnesium and draw contaminants that leave black soot. If you see smut, revisit cleaning, gas coverage, and torch angle; often the solution is simply more decisive travel with a shorter arc and better coverage.
Filler Metal Handling and Technique
Even perfectly clean base metal can be undermined by dirty filler. Store rods in tubes or sealed containers away from grinding dust and wipe them with solvent before use. Match filler chemistry to base metal for color harmony—on stainless, 308L/309L/316L as appropriate; on aluminum, 4043 or 5356 depending on strength and color needs. Choose the smallest diameter that feeds smoothly without chilling the puddle excessively; undersized wire is easier to feather in gracefully. Keep the filler at the shielded front edge of the puddle and avoid sticking it in the arc cone where it oxidizes instantly.
Consistent feeding is the signature of a beautiful bead. For flat work, small, even dabs at a steady cadence create symmetrical ripples that reflect light uniformly. On pipe and tubing, walking the cup produces a uniform “stacked dime” pattern with excellent gas coverage from the cup’s contact. Whether freehand or walking, keep a stable arc length and add filler low and forward to avoid turbulent balling. If you accidentally touch tungsten, stop, regrind, and re-establish clean conditions—contamination will cloud the next inches of bead.
- Pre-wipe filler rods; keep them capped between uses
- Feed at the puddle’s leading edge, not directly through the arc
- Use small, frequent additions to maintain bead crown and wetting
- Regrind tungsten immediately if contaminated; don’t “burn it off”
Trailing Shields, Post-Flow, and Post-Weld Color Control
Maintaining coverage after the arc passes is key to a mirror finish on stainless and reactive alloys. Trailing shields, oversized gas-lens cups, or auxiliary trailing cups bathe the cooling bead in argon until it falls below oxidation temperature. Dial in post-flow generously and don’t lift off too quickly; keep the torch over the crater during downslope to protect the solidifying pool. For long runs, consider a simple trailing shoe or even a flexible purge cup taped to the torch body as a cost-effective hack. The smoother the shielding handoff, the brighter the bead.
Thermal management is the other half of color control. Minimize dwell at tie-ins, use downslope and crater-fill features to avoid crater cracks, and allow cooling between passes. If light straw appears on stainless, you’re right on the edge—speed up, shorten your arc, or increase shielding coverage. Blues and grays indicate excessive heat or poor shielding; fix the process rather than relying on aggressive post-cleaning. The goal is a clean, silvery as-welded finish that needs minimal touch-up.
- Use trailing shields for stainless, titanium, and nickel alloys
- Increase post-flow and keep the torch over the cooling bead
- Control interpass temperature and avoid long dwells
- Use downslope and crater-fill to finish without discoloration
Troubleshooting Common Defects That Kill a Mirror Finish
When the bead loses its shine, the cause is usually traceable to shielding or heat. Dull, gray surfaces point to oxygen contamination from drafts, leaks, or excessive arc length. Straw or blue heat tint on stainless signals too much heat input or inadequate trailing protection. Black soot on aluminum often comes from contamination, too-long arcs, high travel drag angles, or insufficient cleaning of oxides and oils. Porosity and haze can result from moisture in gas lines or torch bodies, dirty filler, or poor purge practice.
- Dull gray on stainless: Reduce arc length, increase gas coverage, fix leaks
- Straw/blue heat tint: Lower amperage, move faster, add trailing shield/post-flow
- Black soot on aluminum: Improve cleaning, shorten arc, adjust AC balance, remove drafts
- Sugaring on stainless root: Inadequate purge or purge disrupted; ensure O2 is <100 ppm
- Porosity: Dry gas, purge lines, and torch; clean filler; check cups and diffusers
- Crater cracks: Use downslope/crater-fill; maintain post-flow and cover the crater
Systematically change one variable at a time to isolate the cause. Start with the basics—gas purity and flow, arc length, torch angle—before diving into advanced settings. A notebook with settings, materials, and outcomes will accelerate your learning curve and help you replicate mirror results on demand. When everything is right, troubleshooting becomes rare and the finish speaks for itself.
Finishing Touches: Polishing and Passivation Without Hiding Flaws
The benchmark for a mirror-finish TIG weld is minimal post-processing. That said, light finishing can brighten a clean bead without masking defects. For stainless, remove any trace heat tint with low-aggression methods first: nonwoven pads, dedicated stainless compounds, or electrochemical weld cleaners that both clean and repassivate. Citric-acid-based gels can restore passivity without the harsher byproducts of pickling pastes—use according to instructions and rinse thoroughly. Avoid heavy grinding on the bead crown; it flattens the profile and advertises poor process control.
On aluminum, a clean as-welded surface can be lightly buffed with fine nonwoven media to uniform sheen, but keep it minimal to preserve crisp edges. If your application requires a high-polish look across the entire part, blend surrounding parent metal more than the bead itself to maintain consistent reflectivity. Remember that finishing should enhance an already excellent weld, not rescue a compromised one. Invest the effort up front in cleaning, shielding, and heat control, and your post-weld work will be quick and gentle.
Putting It All Together: A Repeatable Recipe for Glossy Beads
Mirror-finish TIG welds come from stacking small, correct decisions. Clean the joint and filler meticulously, fit parts tightly, and purge when the backside matters. Set up with pure argon, a gas lens, and a large cup, and tune pre- and post-flow generously. Grind your tungsten properly, hold a tight arc, and use a shallow torch angle. Meter heat with pulse and a responsive amperage control, feed small dabs at a steady cadence, and add trailing protection as the bead cools.
In practice, a sample recipe for 1.6 mm (0.063 in) stainless fillet might be: DCEN, 2% lanthanated 1.6 mm tungsten, #12 gas-lens cup at 22 CFH, pre-flow 0.7 s, post-flow 8 s, pulse 1.5 Hz at 35% background, 40% peak time, arc length ≈ 1× tungsten diameter, 0.9 mm filler, brisk travel with small, regular dabs, and a simple trailing shield for long runs. For 3 mm (1/8 in) aluminum, try AC at 120–150 Hz, 70–75% EN, pointed 2.4 mm tungsten, #8–#10 gas-lens cup at 18–22 CFH, short arc, decisive travel, and careful oxide removal beforehand. Adjust to your machine and joint, record the results, and refine. With repetition, glossy, camera-ready TIG beads become a reliable outcome rather than a lucky pass.